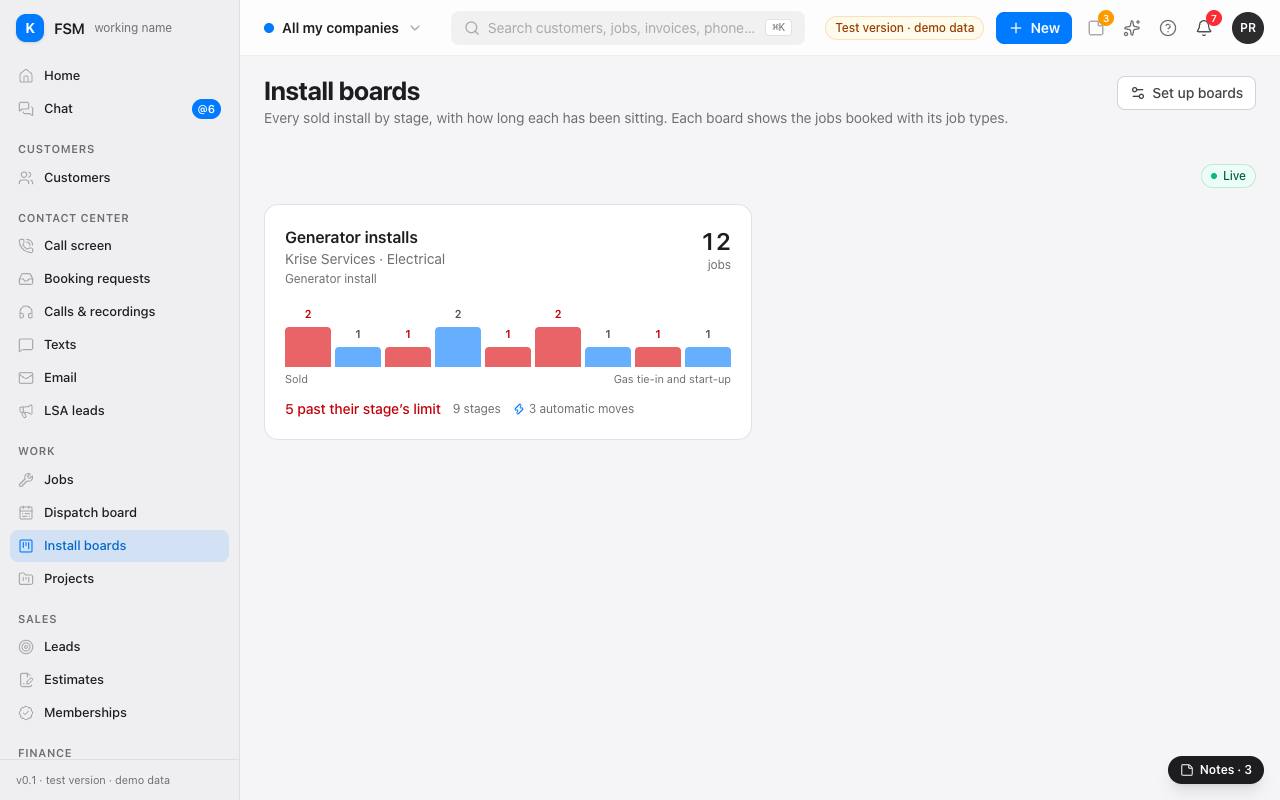
Job tags and install boards are set up in Settings, under Work. Tags label jobs, such as VIP or Permit required; install boards follow every sold install of a kind, such as generators, stage by stage.
Make a job tag
- 1Open Settings → Job tags and press Add tag.
- 2Type its Name and pick a Color. The Preview shows how it will look.
- 3Pick the Company, and under For whether it's for every division or just one.
- 4Press Add tag. It's ready to use on jobs right away.
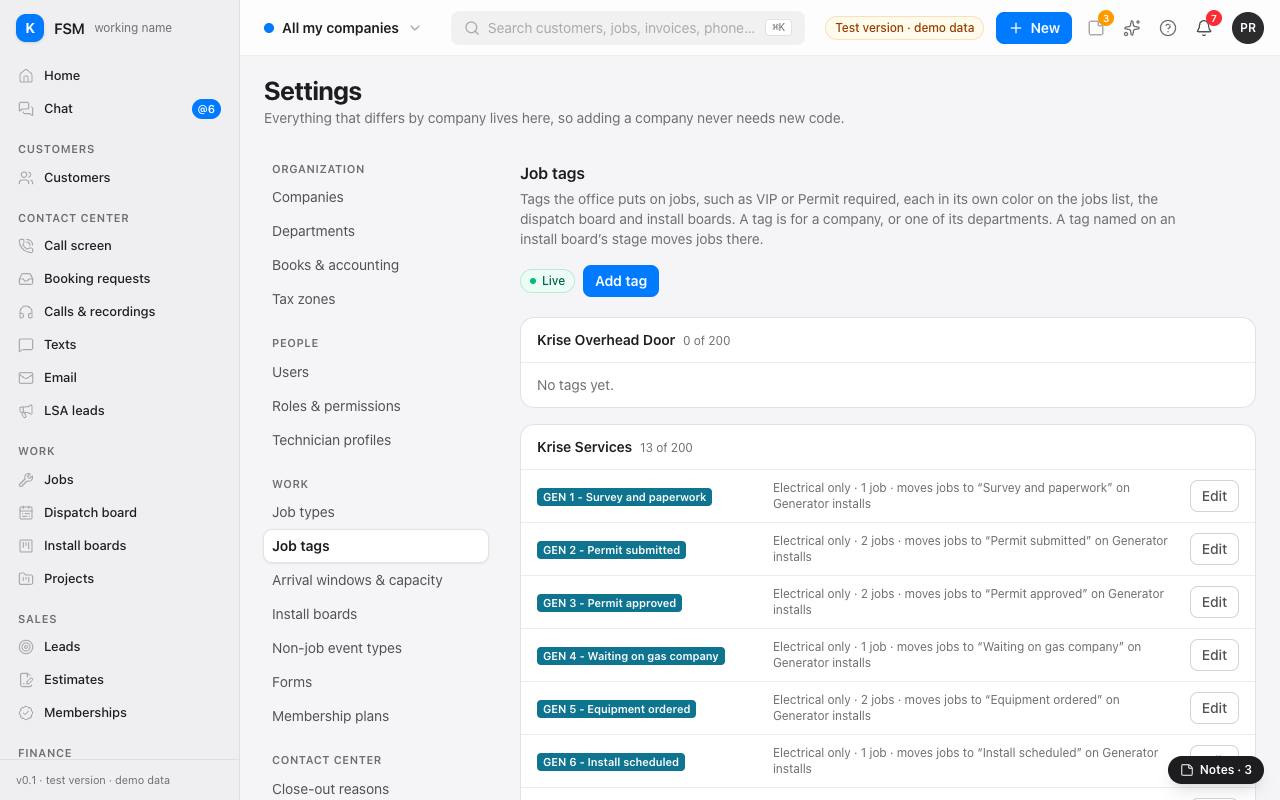
Tip: Edit changes a tag's name or color everywhere it's used. The list says how many jobs carry each tag and, for a stage's tag, which board stage it moves jobs to.
Set up an install board
- 1Open Settings → Install boards and press Add board, or Edit on one.
- 2Pick the company and division, and the Job types whose jobs belong on it.
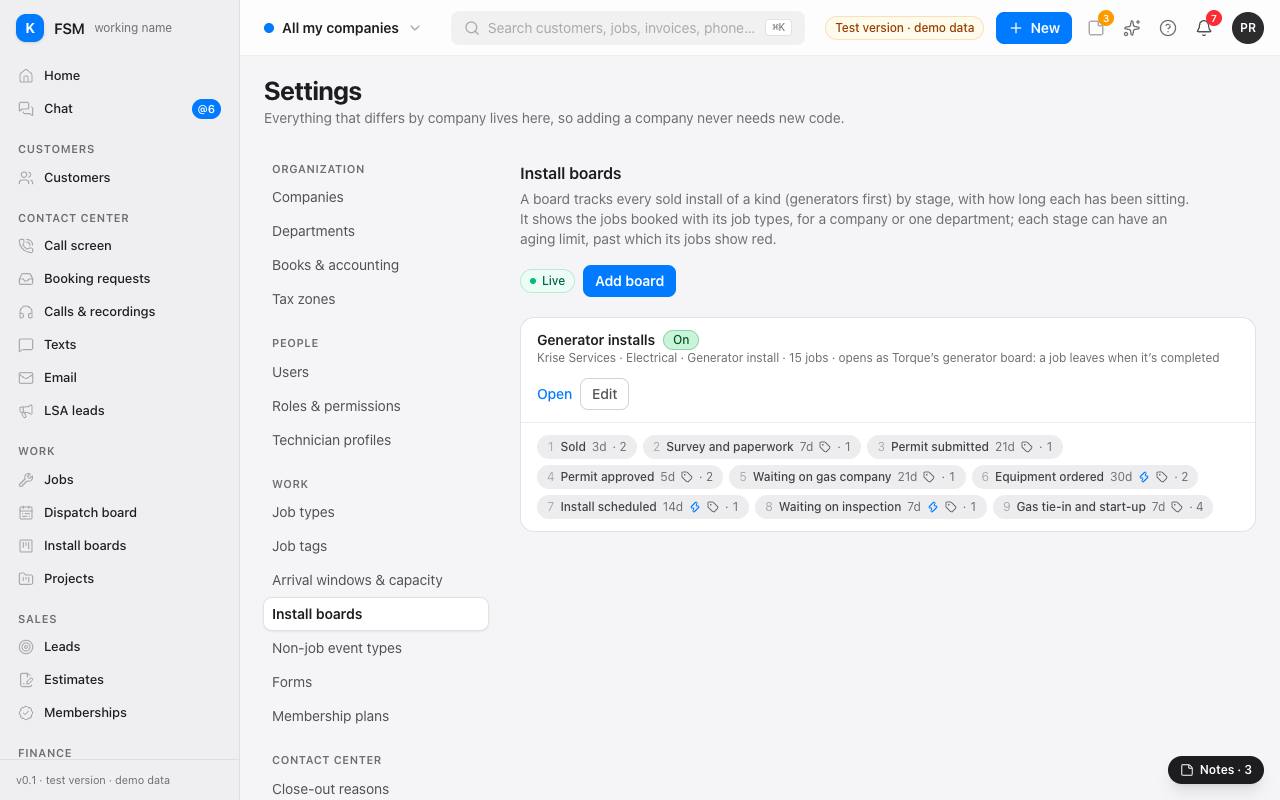
- 3Add its Stages, in order. For each, set a Limit in days: a job sitting longer than that shows red.
- 4Choose how a job reaches each stage: Moved by people only, or automatically, for example When a visit on the job is scheduled or When the job's invoices are paid in full.
- 5To move jobs with a tag, pick the stage's tag. Tagging a job with it moves the job to that stage, as the old GEN tags did.
Use the board
Open Install boards in the menu. Each board shows how many jobs sit in each stage and how many are past their stage's limit. Open a board to see its jobs stage by stage. To move a job on, change its stage's tag on the job's page: the board follows.